• Menu
  • Skip to primary navigation
  • Skip to main content
  • Skip to primary sidebar

Before Header

  • The GAPS Diet: Everything You Need to Know
  • Blog
  • Contact

Health, Home, & Happiness

Your resource for a healthy happy home

Mobile Menu

  • THE GAPS DIET
    • I want to do the GAPS Diet, where do I start?
    • What Is The GAPS Diet?
    • GAPS Intro Diet Ebook
    • GAPS Intro Stages
    • Moving To The Next GAPS Stage
    • GAPS Family
    • GAPS & Breastfeeding
    • GAPS Cheats
    • GAPS Troubleshooting
    • Ketogenic GAPS
  • THE KETO DIET
    • How to Start the Ketogenic Diet & What You Can Eat on Keto
    • Keto Diet for Kids: Risks and Benefits (huge benefits!)
    • The Ketogenic Version of the GAPS Diet
    • Boost Your Keto: 3 Quick Changes to Get More Out of a Low Carb Diet
    • Why You Need Fat Bombs (low carb, keto, GAPS)
  • Recipes
    • breakfast
    • Main Dish
    • Dessert and Treats
    • keto recipes
    • Dairy-Free
    • Carnivore Diet/Zero Carb Diet
  • About
    • About Cara
    • Leaky Gut Treatment Through Diet
    • Healing Brain Trauma with Food, Supplements, and Lifestyle (Autism, TBI, PTSD)
    • Gourmet Candymaking Without Corn Syrup, Canned Milk, Artificial Colors or Flavors
    • The Soup Challenge
    • Folate vs Folic Acid, Tongue Ties, and Why I Regret Taking My Prenatal Vitamin
  • BeautyCounter
    • Shop Safer Skincare and Makeup
  • Classes & Ebooks
    • What Can I Eat Now? 30 Days on the GAPS Intro Diet
    • Gut-Healing Starter Pack
    • Picky Eating Solution Webinar
    • Keto Family Class
    • Freezer Cooking Class
    • Candy Making Without Corn Syrup
    • Member Login
    • Carnivore Training Wheels Class Login

How to Make 24-Hour Yogurt in the Dehydrator (easy directions for SCD and GAPS)

Home » Do it yourself and save » How to Make 24-Hour Yogurt in the Dehydrator (easy directions for SCD and GAPS)
Jump to Recipe Print Recipe

SCD GAPS 24 Hour yogurt

When I first started making yogurt I used a cooler to keep the yogurt warm enough to incubate. Yogurt is pretty forgiving, but for GAPS and SCD we want to use up all the lactose in the milk so the temperature needs to be kept at an even 100 degrees for a full 24 hours. The Excalibur dehydrator has a temperature setting that can easily hold this temperature for you. With the trays pulled out, you can fit literally gallons of yogurt in the dehydrator at one time!

How to make Yogurt in the Dehydrator:

Ingredients:

½-2 gallons milk (goat or cow, raw or pasteurized.  Preferably raw and from cows or goats eating fresh pasture)

1 quart cream (optional)

Yogurt starter.  The Specific Carbohydrate Diet requires a yogurt starter with only acidophilus, on the GAPS diet plain high quality yogurt from the health food store can be used as the starter.

Directions:

In a stock pot, heat milk gently on medium heat, stirring approximately every 10 minutes, until milk is close to a boil.  Cover, remove from burner, and allow to cool until the yogurt is comfortable to the touch, 90-110* F.

Make sure the yogurt is not too hot at this stage, or you will kill the good bacteria that are going to make your yogurt into milk.  Place yogurt starter in the warm milk and whisk or stir to distribute evenly.

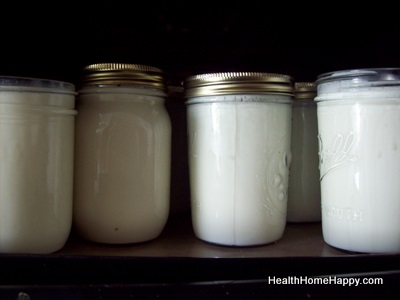
Pour milk with starter into the glass jars, if you’re using quart sized jars, they do fit in the 5-tray dehydrator you just have to tilt them to get them in there.

Cover, and shake to distribute culture even more. Place covered jars in the dehydrator, and turn to 100 degrees for a full 24 hours.

Yogurt is now done and should be kept in the refrigerator.


Miscellaneous yogurt tips:

  • Do you miss the grab-and-go yogurt cups from the grocery store? It’s so simple to just pour your milk mixture into small individual size jars before incubating! Then just stack them in the dehydrator. We have both 4 ounce and 8 ounce jars for this purpose- so cute!  These, and any size jar (I’ve done half gallons sideways in the dehydrator too) all take 24 hours.
  • Whenever you’re concerned about immune function, whether it’s during the winter when sickness is going around or during any stressful time, add just a few dried elderberries to your finished yogurt, the whey in the yogurt will plump them up a little and they’ll turn the yogurt a pretty pink!
  • The #1 reason yogurt fails is if it’s too hot when you put the starter in.  If the heat kills the starter, it can’t culture! The second thing that gets me is if my fresh (raw) milk is old- then it will separate into curds and whey all too often. I try to use it within 3-4 days of receiving it, knowing that it may have been in the fridge a few days before it was delivered to my milk drop.  Fresh milk from healthy cows is safe to drink after that, it just tends to turn to curds and whey for me when I try to make it into yogurt :)
  • Raw yogurt (not heated above 115 degrees)- I have never had success with this! If you have, can you leave tips in the comments? Heating the milk on the stove isn’t the same as industrially pasteurizing it, it heats slowly so it doesn’t change the protein structure.  Though it does lose the enzymes and friendly bacteria found in raw milk.
  • If curds and whey do form, that’s okay, save the curds as yogurt cheese and the whey for your cultured veggies.
  • Another way to make yogurt cheese is with a coffee filter.

Do you make yogurt? I love to! It’s a great way to save money too, with the cost of the finished yogurt being virtually just what you paid for milk!

Making SCD/GAPS Yogurt in the Dehydrator

Course: Basic
Cuisine: GAPS, Paleo, SCD
Prep Time: 1 hour
Cook Time: 1 day
Total Time: 1 day 1 hour
Servings: 1 gallon
Author: Cara Comini
Yogurt cultured for 24 hours at 100 degrees has used up most of the lactose, making it suitable for the GAPS and SCD diets.
Print

Ingredients

  • ½-2 gallons milk goat or cow, raw or pasteurized. Preferably raw and from cows or goats eating fresh pasture
  • 1 quart cream optional
  • Yogurt starter. The Specific Carbohydrate Diet requires a yogurt starter with only acidophilus on the GAPS diet plain high quality yogurt from the health food store can be used as the starter.

Instructions

  1. In a stock pot, heat milk gently on medium heat, stirring approximately every 10 minutes, until milk is close to a boil. Cover, remove from burner, and allow to cool until the yogurt is comfortable to the touch, 90-110* F.
  2. Make sure the yogurt is not too hot at this stage, or you will kill the good bacteria that are going to make your yogurt into milk. Place yogurt starter in the warm milk and whisk or stir to distribute evenly.
  3. Pour milk with starter into the glass jars, if you're using quart sized jars, they do fit in the 5-tray dehydrator you just have to tilt them to get them in there.
  4. Cover, and shake to distribute culture even more. Place covered jars in the dehydrator, and turn to 100 degrees for a full 24 hours.
  5. Yogurt is now done and should be kept in the refrigerator.


Learn how to heal leaky gut

60-page ebook of all my best GAPS Diet (Gut and Psychology Syndrome) articles all in one place.

Success! Now check your email to confirm your subscription.

There was an error submitting your subscription. Please try again.

Powered by ConvertKit
Please follow and like us:
error
fb-share-icon
Tweet
fb-share-icon
← How to Dehydrate (Dry) Strawberries How to Prepare Cultured Vegetables →

About Cara

Cara is the main author here at Health Home and Happiness. She loves the health and energy that eating well and playing well provides and has a goal to share what she's learned with as many families interested in making healthy changes as possible.

She helps other families achieve health in simple steps through healing their gut with the GAPS Diet and helps them stock their freezer for busy days with the Allergy-Friendly Afternoon Freezer Cooking Class.

Previous Post: « Astonishingly Simple and Delicious Chocolate Skillet Cake
Next Post: How to Prepare Cultured Vegetables »

Reader Interactions

Comments

  1. jeanette

    May 15, 2016 at 12:53 pm

    Hi there, I culture raw milk and it seems to work, every now and then I do an ‘pasteurized’ batch and freeze in ice cube trays for yogurt starter (1cube = 1TBSP) doesn’t seem to work when the starter is raw.
    Homemade yogurt is fab and cheap especially when on a dairy farm!!

    Reply
  2. Kelly

    May 16, 2016 at 6:31 am

    Great article Cara! What a great idea to add elderberries. I’ve never had success culturing raw milk under about 180, either…. but do it exactly the way you described and it works great!! I need to make some today with Friday’s milk. :)

    Reply
  3. Alice

    May 19, 2016 at 6:59 am

    I make raw yoghurt. It is a different texture but works fine. I find it depends a lot on which starter i use as to the texture. The one we use at the moment tends to separate a bit but another one was quite gloopy and worked especially well with raw sheeps milk. One time i used pasteurised milk and my daughter didn’t like it as she is used to the texture of the raw (it was the same milk but the farmer ran out of raw).

    Reply
  4. Jenny

    October 10, 2016 at 4:39 pm

    5 stars
    Hi,
    Thanks for your post! Super informative.
    I just started GAPS and bought a 9 tray excalibur Dehydrator to learn the dial only goes as low as 105, however I’ve heard the actual temperature range can go as low as 85. I’m a little confused. I’ve looked at a lot of blogs including yours and everyone seems to have the same model but they say they heat their yogurt at 100 or 95 in the dehydrator. The ones that have settings that low are digital and double the cost. I’m wondering if you happen to have any answers?
    Warmly,
    Jenny

    Reply
    • Health Home and Happiness

      October 12, 2016 at 7:38 pm

      Jenny,
      From what I understand as long as the yogurt is not incubated at over 110 degrees F then it is okay. I think just turning the dial to 105 degrees should work well.

      Katherine

      Reply
  5. lexee

    December 13, 2016 at 10:04 pm

    we make yogurt with raw goat milk in our excalibur regularly! mine separates into curds and whey when it gets too hot. we don’t add lids, and set the temp to 98 (i’ve read and agree that excaliburs seem to run a little hot). works great for us!

    Reply
  6. Teresa Hill

    April 12, 2017 at 10:46 am

    5 stars
    Success with your recipe! My first attempt to make GAPS yogurt (crockpot method) was a failure, so I purchased a food dehydrator. This recipe worked perfectly, and I now have a beautiful line-up of yogurt-filled glass jars in my fridge. My family of 5 is slowly building up our tolerance for it. We all love it with a drizzle of regional honey and some blueberries.

    Reply
    • Cara

      April 12, 2017 at 10:51 am

      So glad to hear Teresa!

      Reply
  7. Jennifer N.

    April 12, 2017 at 11:35 am

    Can I reuse pasta mason jars and lids in Excalibur dehydrator for yogurt? Do I need new lids? Do you put lids on during the 24 hour period?

    Reply
    • Cara

      April 12, 2017 at 12:23 pm

      Yes, any lid is fine- they don’t even need to be air tight, and yes, I use lids when I culture the yogurt :)

      Reply
  8. Bonnie Werner

    August 1, 2017 at 1:56 pm

    I use only raw milk and never heat it. I just mix in the starter, plain organic yogurt with as many bacteria strains as I can find, sometimes combining two kinds, then place it in my oven with the light on for 24 hours. It works well.

    Reply

Trackbacks

  1. DIY Soup Packs for Cheap & Instant Soups Loaded with Veggies and Protein | Health, Home, & Happiness says:
    September 22, 2016 at 1:08 pm

    […] with fresh-pressed olive oil, coconut milk, yogurt, fresh lemon juice, or fresh herbs like snipped chives after […]

    Reply
  2. The Health Home and Happiness Top 10: Top health articles, products readers love, recipes, and more! - Health, Home, & Happiness says:
    November 18, 2016 at 11:22 am

    […] 9. GAPS Yogurt in the Dehydrator […]

    Reply
  3. How to Quickly Fill Your Fridge with Probiotic-Rich Cultured Veggies - Health, Home, & Happiness says:
    November 21, 2016 at 6:46 am

    […] unless it contains some sort of fermented food with live cultures, whether that’s milk kefir, high quality yogurt, kombucha, or fermented vegetables like those shown […]

    Reply
  4. 24 Mini Changes For a Healthy Day - Health, Home, & Happiness says:
    March 1, 2017 at 6:02 am

    […] If you struggle getting breakfast for the kids, make-ahead slow cooker oatmeal, make-ahead homemade yogurt cups, or smoothies are all fast breakfasts with nutrition needed for growing […]

    Reply
  5. Time Management for Freezer Cooking: Recipe Sequencing - Health, Home, & Happiness says:
    May 10, 2017 at 6:58 am

    […] Sweet Potatoes take 3 batches in the Instant Pot, so we start them early as well.  Yogurt (recipe) has to come up to temperature, then cool back down before we can finish the process, so […]

    Reply
  6. Homemade Chocolate and Sea Salt Protein Bar (copycat RX Bar) - Health, Home, & Happiness says:
    June 3, 2017 at 10:33 am

    […] the late summer when we’re saving produce for the winter.  A dehydrator can be used to make yogurt, fruit leather, crispy nuts, dried fruit, and […]

    Reply
  7. Homemade Mixed Berry Paleo Protein Bar (copycat RX Bar) - Health, Home, & Happiness says:
    June 3, 2017 at 4:03 pm

    […] the late summer when we’re saving produce for the winter.  A dehydrator can be used to make yogurt, fruit leather, crispy nuts, dried fruit, and […]

    Reply
  8. Homemade Apricot-Coconut Paleo Protein Bars (GAPS, Whole30, like RX Bars) - Health, Home, & Happiness says:
    June 3, 2017 at 4:21 pm

    […] the late summer when we’re saving produce for the winter.  A dehydrator can be used to make yogurt, fruit leather, crispy nuts, dried fruit, and […]

    Reply
  9. Savvy Supplement Yogurt Cups - Health, Home, & Happiness says:
    July 14, 2017 at 6:55 am

    […] remedy this, I’ve been putting our supplements in plain yogurt (see how to make here), but you could easily use chia pudding, homemade applesauce, or anything with a soft stir-able […]

    Reply
  10. Mocha Whole Food Paleo Protein Bars (Copycat RX Bars) - Health, Home, & Happiness says:
    August 7, 2017 at 4:24 pm

    […] the late summer when we’re saving produce for the winter.  A dehydrator can be used to make yogurt, fruit leather, crispy nuts, dried fruit, and […]

    Reply
  11. Seven series: Food – a patch of earth says:
    September 26, 2017 at 2:16 am

    […] that do require kneading. The yogurt wasn’t as firm as I remembered. I used to make A LOT of 24-hour yogurt with our Excalibur dehydrator when I was healing from SIBO four years ago, and I remember the […]

    Reply
  12. Hearty & Nourishing Red Chili - Health, Home, & Happiness says:
    October 26, 2017 at 10:40 am

    […] Sour Cream (homemade, 24-hour, recipe here) […]

    Reply
  13. Real Food on a Budget: 25 Tips to Make Eating Healthy Affordable says:
    October 22, 2018 at 10:49 am

    […] How to make yogurt in a dehydrator […]

    Reply
  14. Stainless Steel Excalibur Dehydrator Review says:
    November 16, 2018 at 7:50 am

    […] How to make yogurt in a dehydrator […]

    Reply
  15. The Ketogenic Version of the GAPS Diet - Health, Home, & Happiness says:
    January 11, 2019 at 7:36 am

    […] 24-hour yogurt made with half and half or heavy cream. […]

    Reply
  16. Mini Keto Cheesecakes with Strawberry Sauce - Health, Home, & Happiness says:
    January 15, 2019 at 4:08 pm

    […] to make your own ‘cream cheese’ by dripping yogurt cheese (directions here) out of your 24-hour yogurt.  The 24-hour yogurt specifically uses up all the lactose in the milk.  Cultured cream cheese […]

    Reply

Leave a Reply Cancel reply

Your email address will not be published. Required fields are marked *

Recipe Rating


Return to top of page

© 2021 healthhomeandhappiness.com · Affiliates · Log in

This website uses cookies to provide you with the best browsing experience.

Find out more or adjust your settings.

Health, Home, & Happiness
Powered by  GDPR Cookie Compliance
Privacy Overview

This website uses cookies so that we can provide you with the best user experience possible. Cookie information is stored in your browser and performs functions such as recognising you when you return to our website and helping our team to understand which sections of the website you find most interesting and useful.

Strictly Necessary Cookies

Strictly Necessary Cookie should be enabled at all times so that we can save your preferences for cookie settings.

If you disable this cookie, we will not be able to save your preferences. This means that every time you visit this website you will need to enable or disable cookies again.